I have been doing a lot of Vaquita artwork recently, so much, in fact, that I have developed a method for drawing this little porpoise. I have created a “How-to-draw a Vaquita” guide for all of you artists out there that are looking to make some Vaquita art. Obviously, this is not a definitive guide, it is just how I draw Vaquitas.
Before anything, you need to figure out exactly what you want the picture to be. You can base your drawing/painting on a photograph, but in this guide I will be drawing a generic Vaquita that can be used for any pose. All I will be using is a pencil and my fingertip.
1. Firstly, you need to draw a rough outline of the body. This needs to be very light. Don’t worry about it not being perfectly smooth yet. Don’t draw any external details, such as stripes or eye-patches. Just the outline. This will take a lot of practice to get right, so don’t give up if you need to erase the outline 10 or more times. A very useful tip is that the mouth is always smiling and pointed directly at the eye, which is slightly above the imaginary horizontal center line of the head.

2. Next you will start adding detail. I prefer to start with the face and work towards the tail fluke. It is very useful to look at a bunch of photographs to get a good idea of what their individual body parts look like. The key points on the head are the eye-patch, mouth-patch, chin-to-flipper stripe, and the tiny ear hole, which is commonly forgotten. Also, begin the dark back, which is basically an extension of the mouth-patch.

3. Take this time to make sure your pencil is very sharp. Redefine all of the details you already made, especially shadows. When you are coloring the back and flipper, make sure you rub the paper very hard with your fingertip to make the texture smoother. Now you can add the lighter gray to the face simply by rubbing, due to the excess lead on your finger. You can also add shading to the underside of the body with the rubbing technique, and the shine on the back by erasing lightly. You can also use the eraser to add subtle touches to the facial pattern, such as a ring around the eye-patch. Don’t forget to show hints of finger bones in the flipper. It is important that you know where the light source is coming from. In this case, the “sun” is above and to the right of the Vaquita, so I have the dark shading on the opposite sides of the light source (bottom left) of every curve. This is especially noticeable on the flipper.

4. Next you need to work on the body. Use the same technique as the head: draw then rub. Make sure you are still looking at some pictures to get an idea of the color pattern. Vaquitas have a dark back, with light gray sides fading to a white belly. Make sure you continue the shine by erasing lightly, as well as drawing subtle muscles. Your fingertip should be pitch black as you are working on this. Next, you can work on the dorsal fin as well as any scars or markings for additional realism.

5. The final step is the tail stock and fluke. Pay close attention to the muscles and ridges of the tail stock, because the shading and lighting is crucial to making it seem real and 3-dimensional. There is a ridge along the vertebrae called a dorsal ridge, as well as a caudal keel, which is a ridge on the side of the tail stock connecting to the fluke. The fluke is basically flat, giving it a more uniform color than other body parts. When you are done with this, take a few minutes to overview the entire drawing. Squint, turn it upside down, take a photo of it, or ask someone else what they think; anything to help get a new perspective of the overall work of art. When you feel like you are completely content with your drawing, breathe a sigh of relief: you drew a Vaquita! Obviously your second try will be better than your first, third better than second, and so on, so stay patient. And of course, I would love to see your masterpiece! Please send your drawings to me at gl.tamarin123@gmail.com, as always.

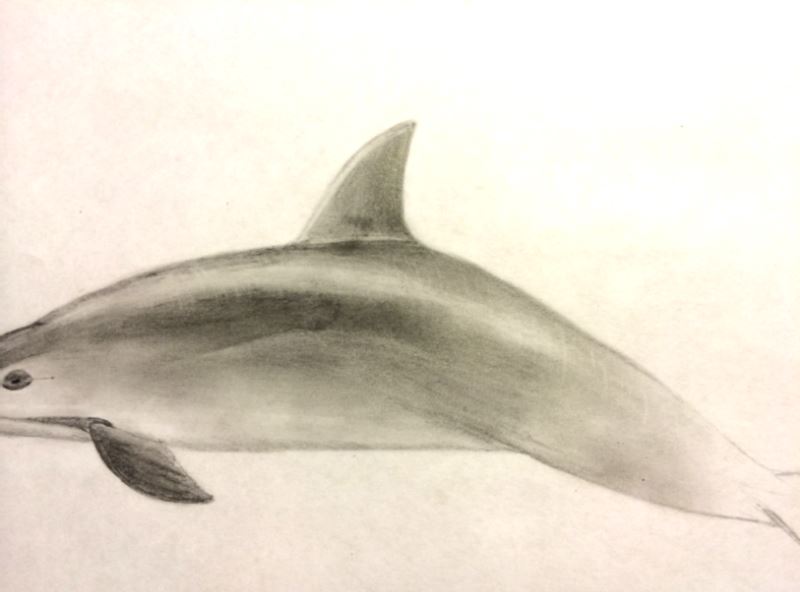
Here is my finished piece.


Thank you. I followed this to make an illustration https://www.behance.net/gallery/51702037/Vaquita-An-endangered-specie
LikeLike
Lovely!
LikeLike